 Passenger / instructors side. Here you have the option to install at a 45 degree angle or in the upright position. This allows for easy installation into any vehicle, be it car, truck, suv, 18-wheeler, ambulance, fire truck, etc. With the angled mounting base plate you have the option to mount the pedal direct to the floor or to the firewall. You can also choose the angle best suited to give you the easiest and most natural angle to press down on with your foot. Normally this is a 45 degree angle to the road surface.
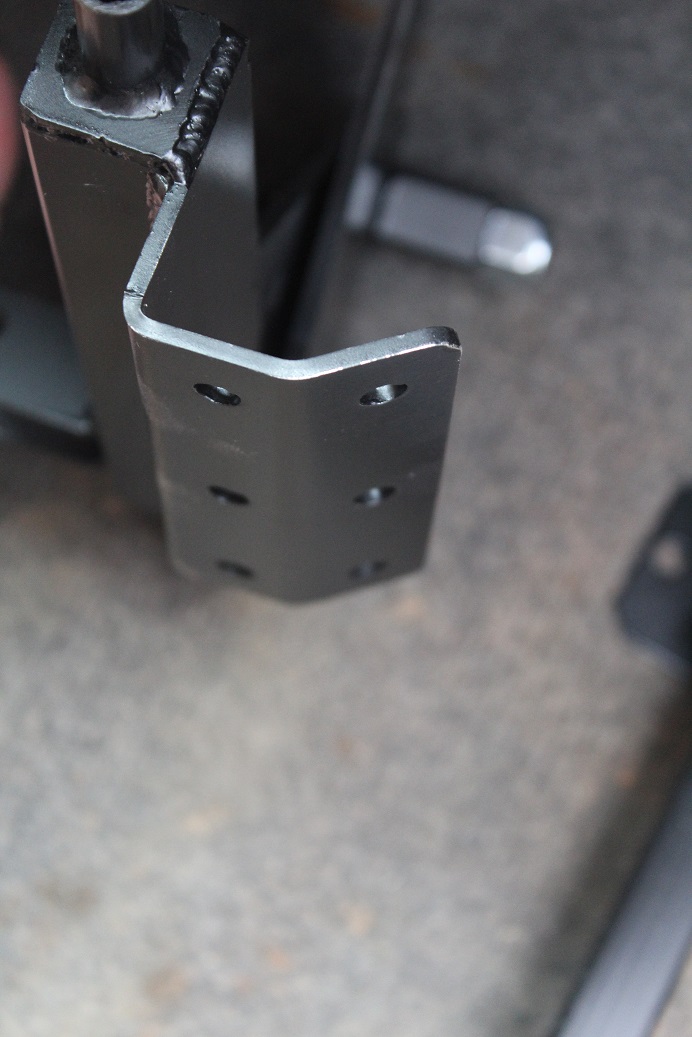
You can use either of the two sides that each have 3 pre-drilled holes. Of these 3 holes you only need to use 2, we drill 3 to give you some options, depending on what is below the carpet or the design of the chassis / body / floor of the vehicle.

Here is an example of mounting it flat on the floor using the flat mounting surface, more difficult to operate as you have to lift your foot higher to operate, this leads to greater time to apply brakes and more fatigue for the brake user / instructor.

Here is an example of mounting to the firewall using the flat mounting surface, results in a comfortable angle for the brake user / instructor.
Here is an example of mounting using the angle mounting surface on the floor of the vehicle, again a great angle to use for the instructor / brake user. You would use this when you want to mount the brake away from the firewall to give more space.

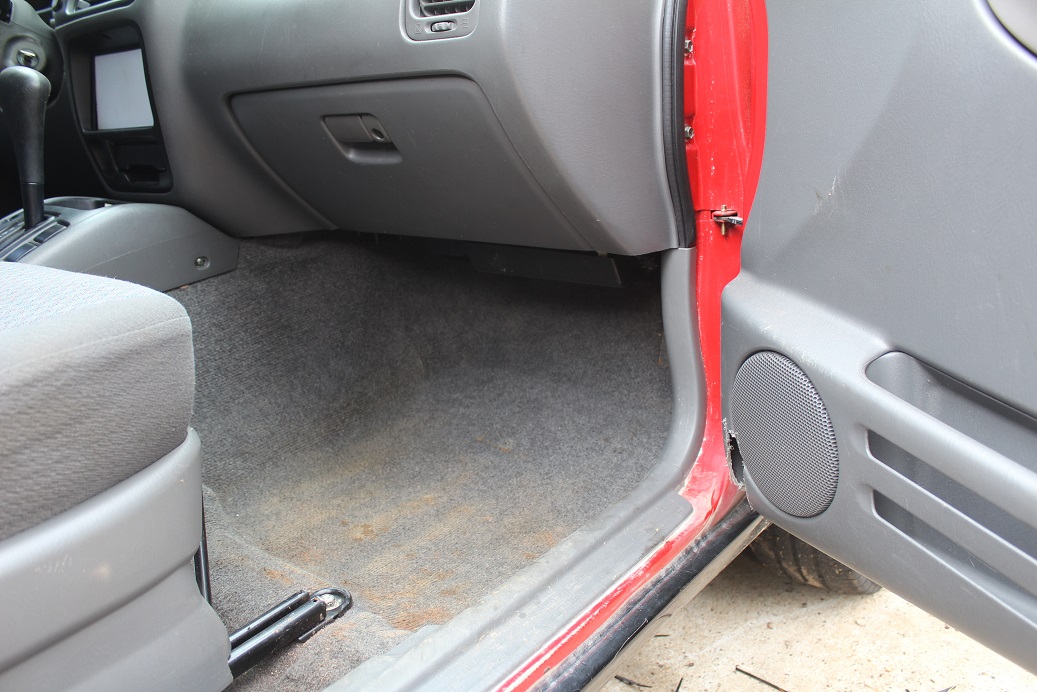
Before making your final selection of where to install the pedal, depress the pedal to the maximum, the pedal arm will pivot, pushing the part of the arm that houses the pulley out to the right.
Make sure that you have enough clearance between the pedal and the side of the vehicle to allow you to depress the pedal all the way to the floor. You want to have the maximum travel for the pedal.
Once you decided on a position, before installing, lift the carpet and inspect beneath the carpet to ascertain the thickness of the padding below the carpet and to see if any electrical cables or computers are located below the carpet before drilling holes. This will also guide you in the length of bolts required. Again use grade 8 fasteners.

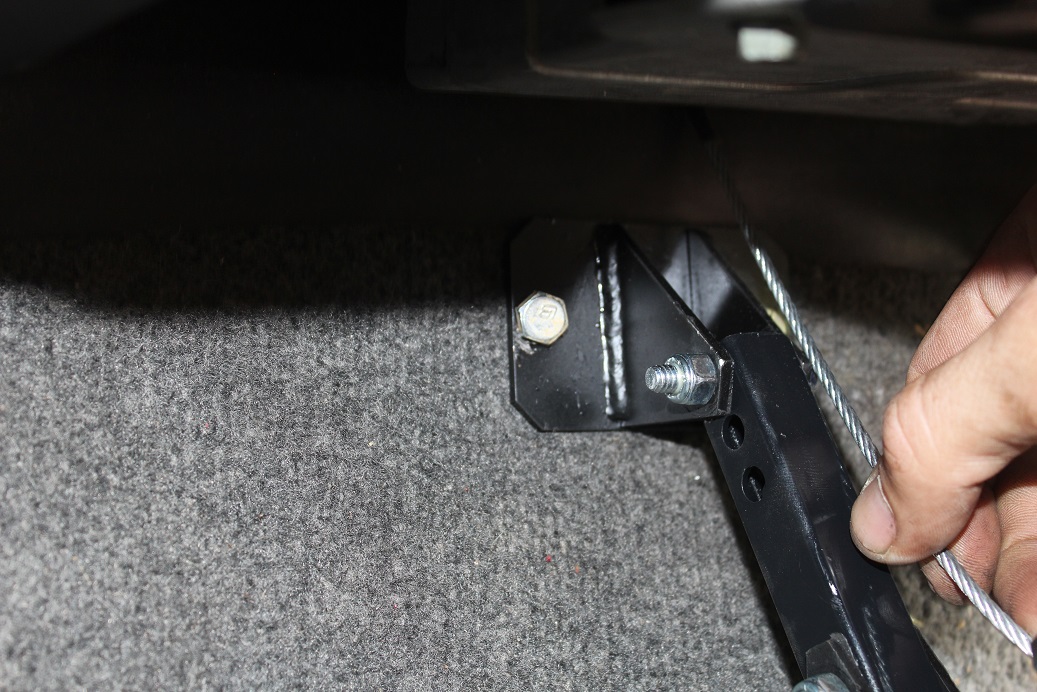
Once you have the pedal assembly secured, you can decide on where to mount the bracket that secures the stabilizing arm. This is important to get this installed as this is integral to ensuring that the installation results in a solid installation where there is no movement on the pedal when using the pedal in an emergency situation.
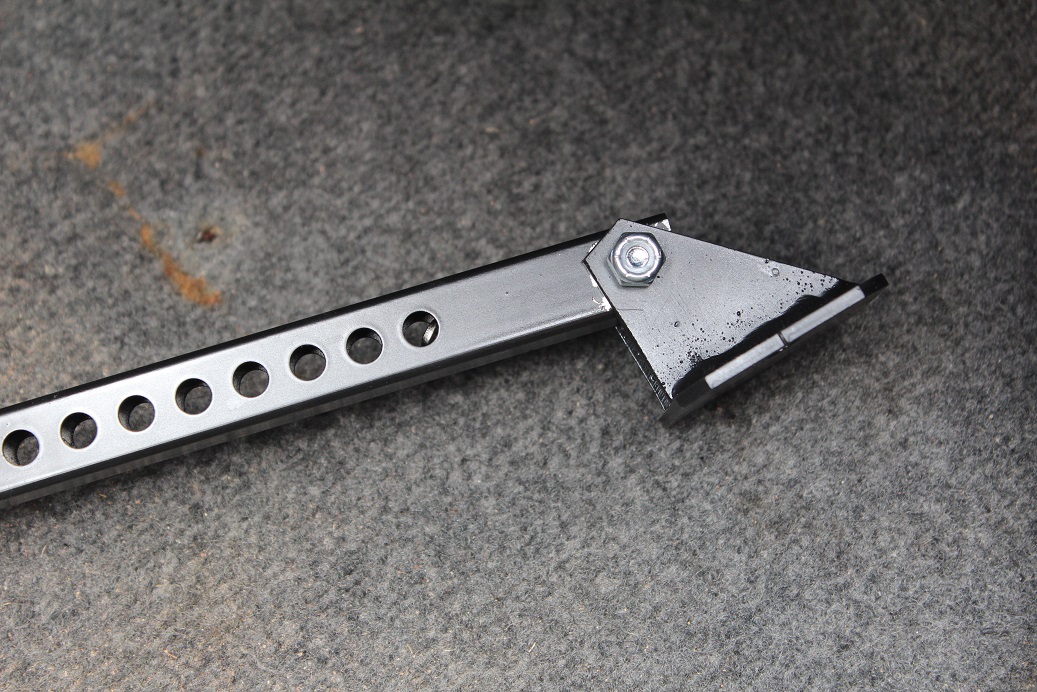
The stabilizing arm is pre-drilled with bolt holes to allow you to install the end bracket in any position / distance from the brake assembly. Once you have the bracket mounted, using grade 8 hardware (bolts & nuts), you can cut the stabilizing arm down to size and install it.
Once you have this installed its time to go to the drivers / students side.
It is very important to understand that you are responsible for the installation, the safety of your vehicle and your occupants as well as other people and they property depend on it. You may have to defend your installation in a court of law if you do not install the brake system properly and if you fail to maintain it.
Cable, pulleys and pulley bolts must to replaced yearly.
Go to the 1st installation instructions page – Passenger side.
Go to the 2nd installation instructions page – Drivers side.
Go to the 3rd installation instructions page – Cable installation.
Order Best Brake and service kits here.
Order Titan Dual Control Brake and replacement parts here.
Buy back program, sell your used brake here.
Home Page – Dual Control Brake for Driving Schools, Drivers Ed, Mail Carriers, Truck Driving Schools
Hand Made in South Carolina, USA
10 Things that make the BEST BRAKE a better dual control brake than any of the competitors.